Friday, February 25, 2011

The first stringer

Today I attempted, successfully, to install the first stringer on the port side. I used a small Electrolux Steamer (thanks to Mark Attard) to apply a little steam to the stringer which I had placed in the 75mm PVC tube you can see on the floor. The steam certainly made the pine stringer more pliable.

In place of clamps in some cases I used electrical cable to pull the stringer into the frame.

I have primed and painted the underfloor area as it is much easier now than after the stringers are in place. I will apply the final coat before the floor goes down.

I used the steamer by hand to apply a little more moister before srewing and glueing.

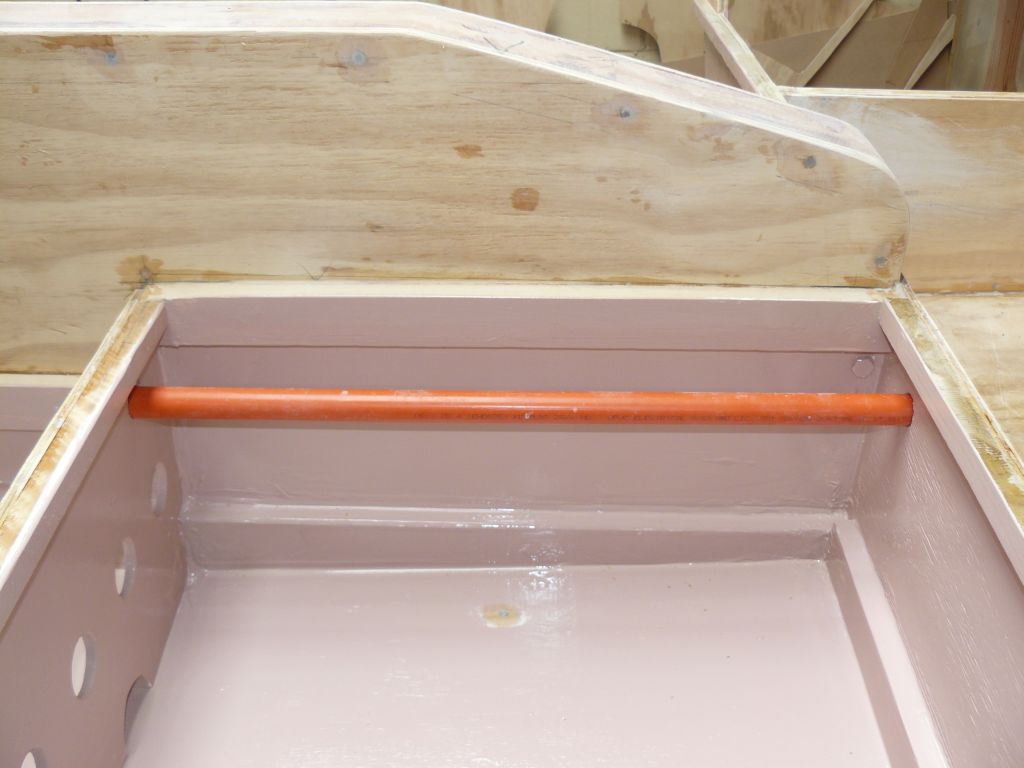
I have inserted two 25mm electrical conduits between the front floor area and cockpit to drain any splash water to the rear.

Sunday, February 13, 2011

Looking like a boat

At last I have the frames mounted and fixed. I am pleased with the results.

Rather than install the seat fronts in two single pieces I split them with frame 6A. This was much easier than trying to cut and install them as a single unit and has not sacrificed any strength.

I decided to omit the access holes in the seat fronts so that the outboard area would serve as additional boyancy. 
Number one frame needed a little encouragement to keep it in line.

I will paint all of the under floor areas before proceeding with the installation of the stingers as access is much easier now.

Saturday, February 5, 2011

Rudder and stock. Slow progress today.

The laminated rudder blank.

The centre case is giving me a headache. First I had trouble getting the second coat of epoxy to cure. Apparently because I didn't wash down the previous coat. Lesson learned. Then I primed the epoxy with Acrylic Undercoat/Primer after a thourough sand and wash before painting with two coats of Yellow enamel. I hope that I have a chieved a good bond.

The rudder cheeks I fabricated from two layers of 9mm ply. I coated the ply with a good thick layer of thickened epoxy then screwed them together.

The rudder is made from 8 layers of softwood with one strip of Myrtle on the leading edge.

Tuesday, February 1, 2011

The build up. 01/02/2011

At last I am working on the building jig. As you will notice I just used scrap material for the profiles. To date the only timber I have purchased is the plywood and Radiata Pine stringers.


To install the first chine stringer I made 30mm cuts into the stringer at 150mm intervals for the full length of the stringer. This made the bend very easy.

To locate the stringer position acurately I screwed blocks at the point where the frames would lie when installed. The blocks were removed as soon as the stringer was clamped and screwed.

The bow end showing the cut to make room for the beam.
I also laminated the timber for the rudder today. I used Douglas Fir from an old crate plus one length of Tasmanian Mytle hardwood for the leading edge. I would like to thank Michael Polson for the use of his thicknesser to shape the Tasmanian timbers I am using in the boat, including a piece of Huron Pine. All of the Tasmanian timber came from my mate Eric Alcock who is currently dying of Cancer. I hope the boat will be a tribute to Eric who I have know for 50 years.